텍스트박스 라인넘버 넣기!
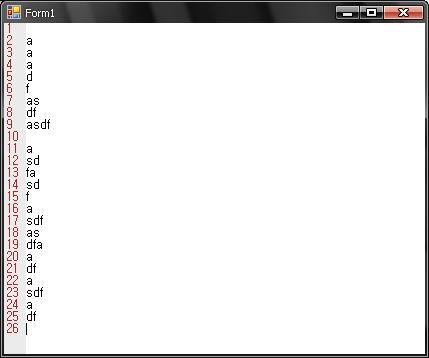
스크롤 처리도 안되있고 글자 폰트는 9pt 밖에 라인에 맞게 그릴순 없는 소스지만
조금만더 노가다를 하묜... 비슷하게 구현되지 않을까 ? 싶어서 일단... 등록해둠.
문제점 : Textbox에 폰트크기와 판넬에 폰트크기가 다르게 표시되는 점.
-> 이래서 글자 줄간격이 차이가 나는데 아래 9pt는 노가다로 1.79라는 수를 구해서 라인별로 곱하는데 다른 크기에서는 다른값이 요구되므로 각 값마다 찾을라면... 이건 미친 노가다라고 보임.
문제점 : Textbox에서 스크롤 되는 위치값 구해서 라인넘버 그려지는 영역에 대한 처리도 해야되는데... 그게 없음.
활용 가치? 그닥 없음. 한번 해본것이기 때문에...
using System;
using System.Collections.Generic;
using System.ComponentModel;
using System.Data;
using System.Drawing;
using System.Text;
using System.Windows.Forms;
namespace TextBox_LineNumber
{
public partial class Form1 : Form
{
public Form1()
{
InitializeComponent();
font = this.textBox1.Font;
}
Font font = null;
private void Form1_Paint(object sender, PaintEventArgs e)
{
int totalLine = this.textBox1.Lines.Length;
for (float loop = 1f; loop <= totalLine; loop++)
{
SizeF sizef = e.Graphics.MeasureString(loop.ToString(), font);
//e.Graphics.DrawString(loop.ToString(), font, Brushes.Brown, 0f, (loop - 1f) * sizef.Height /*); // */ + 1.79f );
e.Graphics.DrawString(loop.ToString(), font, Brushes.Brown, 0f, (loop - 1f) * this.textBox1.Font.GetHeight() - (loop-1)* 1.79f); // 9pt에서 되는놈
}
}
private void textBox1_TextChanged(object sender, EventArgs e)
{
this.Invalidate(new Rectangle(0, 0, this.Padding.Left, this.Height));
}
}
}
'# 2) .Net ( Vs 2005 ) > WinForm' 카테고리의 다른 글
| 데이타 그리드 뷰에 콤보 컬럼에 대한 값 읽기... (0) | 2010.02.05 |
|---|---|
| ListView에 컬럼 동적 제어... (0) | 2010.02.05 |
| 디버그윈도우를 만들어서 적용함. (0) | 2009.10.16 |
| 작업트레이위에 스르륵!! 나타나는 폼! (0) | 2009.10.06 |
| 가상메서드 - 오버라이드... (0) | 2009.10.06 |
디버그윈도우를 만들어서 적용함.
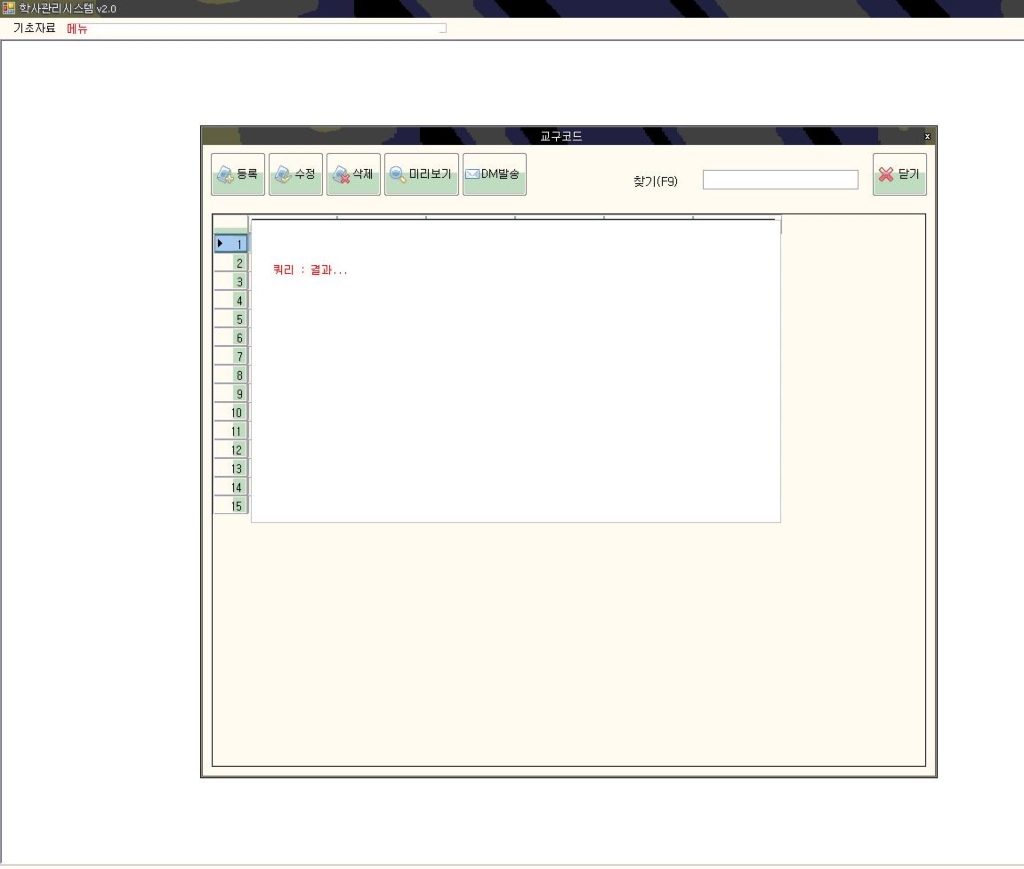
전에도 만들어 썼지만. 이번 플젝에서는 좀더 다루기 쉽게 만들었음.
손수 만든 개발프레임웍에서 쿼리와 파라미터를 중간에 필터링해서 디버그폼으로 전달해주고
디버그 폼은 이를 가지고 있게 됨. 이때 이 디버그폼에서 [쿼리 실행]버튼 을 눌렀을때,
디버그 비즈를 이용해서 쿼리와 파라미터를 이용해 쿼리를 볼수 있게 됨.
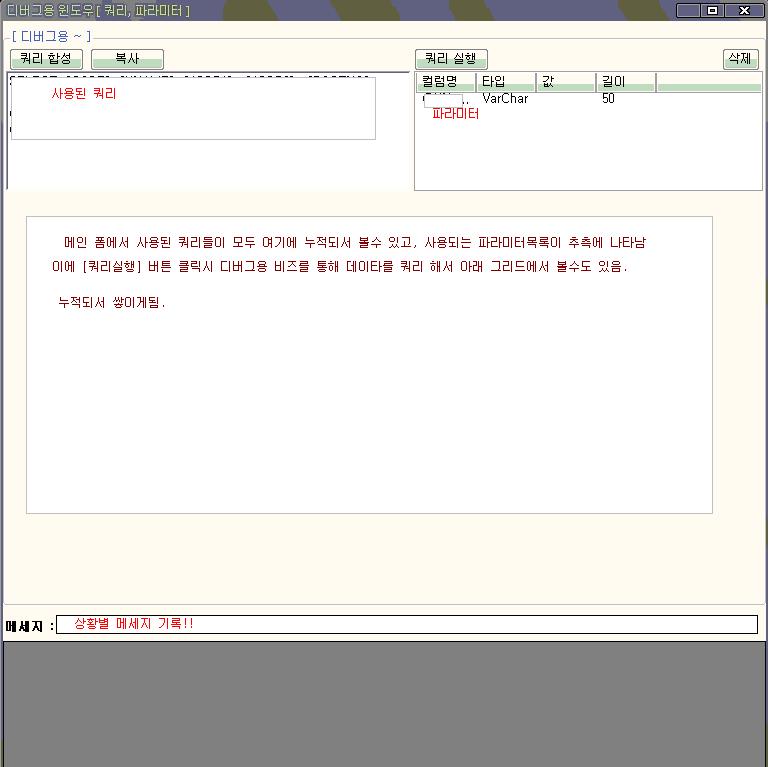
프로그램 디버그모드에서는 항시 떠있으며 쿼리와 파라미터를 받을 대기 상태로 폼 우측에 대기 하게 됨.
DB와 통신하는 순간 디버그윈도우에서는 이를 받아 기록하게 됨.
사용한 개발 프레임웍은 직접 .net 2.0프레임웍으로 만들었으며 dll구성은 7가지로 되있음.
여기에 Biz단과 Form과는 별도의 dll로 구성되있고 디버그폼은 Form Dll에 속함.
Biz에서 발생되는 쿼리들은 모두 디버그 폼으로 대리자를 통해 전달하게 됨.
[ 장점 ]
설치 후 특정 권한이 있는 사용자로 로그인 시켰을때만 볼수 있게 만들어놔서
프로그램 유지보수에 도움이 될듯 함.
디버깅 툴이 딱히 없어도 폼에서 사용되는 쿼리와 파라미터를 직관적으로 볼수 있음.
또 쿼리 합성을 통해 사용되는 쿼리와 파라미터를 조합하여 복사 후 SQL의 쿼리분석기를 통해
쿼리를 바로 확인 가능함!
'# 2) .Net ( Vs 2005 ) > WinForm' 카테고리의 다른 글
| ListView에 컬럼 동적 제어... (0) | 2010.02.05 |
|---|---|
| 텍스트박스 라인넘버 넣기! (0) | 2009.10.26 |
| 작업트레이위에 스르륵!! 나타나는 폼! (0) | 2009.10.06 |
| 가상메서드 - 오버라이드... (0) | 2009.10.06 |
| 그리드뷰 각 Row색 바꾸기. (1) | 2009.09.25 |
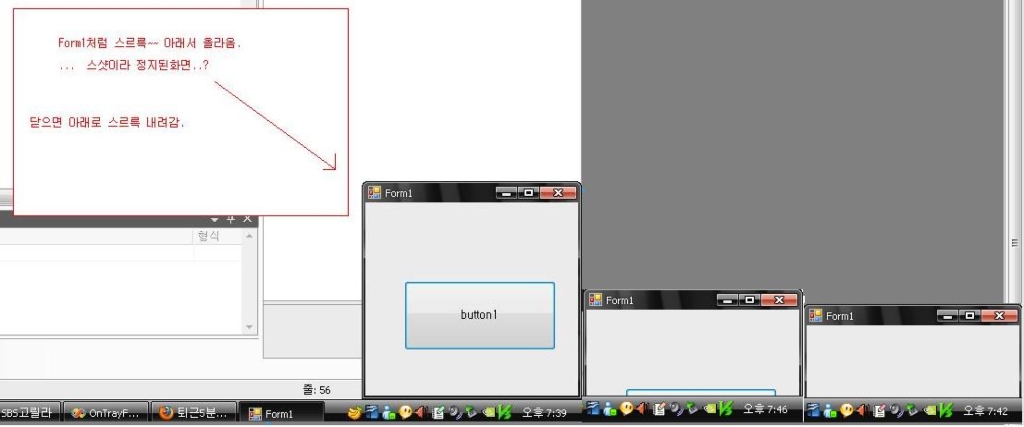
작업트레이위에 스르륵!! 나타나는 폼!
작업 트레이 바로 위에서 오르락~ 내리락~!! 하는 폼 작업해봤음.
using System;
using System.Collections.Generic;
using System.ComponentModel;
using System.Data;
using System.Drawing;
using System.Text;
using System.Windows.Forms;
namespace OnTrayForm
{
public partial class Form1 : Form
{
public Form1()
{
InitializeComponent();
this.StartPosition = FormStartPosition.Manual;
this.Left = Screen.PrimaryScreen.WorkingArea.Right - this.Width;
this.Top = Screen.PrimaryScreen.WorkingArea.Bottom;
}
protected override void OnShown(EventArgs e)
{
this.Left = Screen.PrimaryScreen.WorkingArea.Right - this.Width;
this.Top = Screen.PrimaryScreen.WorkingArea.Bottom;
Timer tm = new Timer();
tm.Interval = 30;
tm.Tick += delegate(object se, EventArgs ea)
{
if (this.Top > ( Screen.PrimaryScreen.WorkingArea.Bottom - this.Height + 5))
this.Top -= (this.Height / 15);
else
{
this.TopMost = true;
this.Top = Screen.PrimaryScreen.WorkingArea.Bottom - this.Height;
tm.Stop();
tm.Dispose();
tm = null;
}
};
tm.Start();
}
bool closing = false;
protected override void OnFormClosing(FormClosingEventArgs e)
{
if( closing == false )
e.Cancel = true;
this.Left = Screen.PrimaryScreen.WorkingArea.Right - this.Width;
this.Top = Screen.PrimaryScreen.WorkingArea.Bottom - this.Height;
Timer tm = new Timer();
tm.Interval = 30;
tm.Tick += delegate(object se, EventArgs ea)
{
if (this.Top <= (Screen.PrimaryScreen.WorkingArea.Bottom + 5))
this.Top += (this.Height / 15);
else
{
this.Top = Screen.PrimaryScreen.WorkingArea.Bottom;
tm.Stop();
tm.Dispose();
tm = null;
closing = true;
this.Hide();
this.Close();
}
};
this.TopMost = false;
tm.Start();
}
}
}
'# 2) .Net ( Vs 2005 ) > WinForm' 카테고리의 다른 글
| 텍스트박스 라인넘버 넣기! (0) | 2009.10.26 |
|---|---|
| 디버그윈도우를 만들어서 적용함. (0) | 2009.10.16 |
| 가상메서드 - 오버라이드... (0) | 2009.10.06 |
| 그리드뷰 각 Row색 바꾸기. (1) | 2009.09.25 |
| Win Form이 스윽~~ 나오는 효과내기 (0) | 2009.09.23 |
가상메서드 - 오버라이드...
그닥.. 설명할게 없으므로... 설명은 패쓰~
using System;
using System.Collections.Generic;
using System.ComponentModel;
using System.Data;
using System.Drawing;
using System.Text;
using System.Windows.Forms;
namespace Virture_Override
{
public partial class Form1 : Form
{
public Form1()
{
InitializeComponent();
SuperClass s = new _BabyBabyOne(this.textBox1.AppendText);
s.Print();
}
}
public class SuperClass
{
public SuperClass( _Print p)
{
prt = p;
}
public delegate void _Print(string text);
protected _Print prt = null;
public virtual void Print()
{
prt("SuperClass :\t public virtual void Print() " + Environment.NewLine);
}
}
public class _BabyOne : SuperClass
{
public _BabyOne(_Print p )
: base(p)
{
}
public override void Print()
{
base.Print();
prt(" _BabyOne :\t public override void Print() " + Environment.NewLine);
}
}
public class _BabyBabyOne : _BabyOne
{
public _BabyBabyOne(_Print p)
: base(p)
{
}
public override void Print()
{
base.Print();
prt(" _BabyBabyOne :\t public override void Print() " + Environment.NewLine);
}
}
}
'# 2) .Net ( Vs 2005 ) > WinForm' 카테고리의 다른 글
| 디버그윈도우를 만들어서 적용함. (0) | 2009.10.16 |
|---|---|
| 작업트레이위에 스르륵!! 나타나는 폼! (0) | 2009.10.06 |
| 그리드뷰 각 Row색 바꾸기. (1) | 2009.09.25 |
| Win Form이 스윽~~ 나오는 효과내기 (0) | 2009.09.23 |
| XmlHelper 를 만들다. (0) | 2009.09.23 |
그리드뷰 각 Row색 바꾸기.
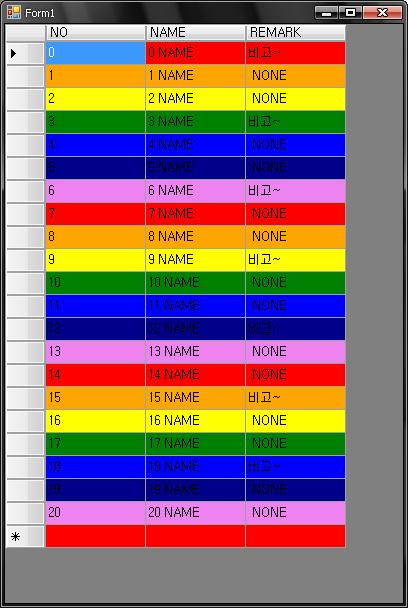
기본적으로 기본스타일 + 홀수행 스타일 바꾸면 홀짝 홀짝 ... 색조절은 가능하다.
특정열에 어떤 값에 따라 Row에 표시하고자 할때 사용하기위해 만들다가
그냥 블로깅 해둔다.
예제로 무지개색를 넣었음.
public partial class Form1 : Form
{
public Form1()
{
InitializeComponent();
DataTable dt = new DataTable();
dt.Columns.AddRange(new DataColumn[] {
new DataColumn("NO"), // 열값에 따라 색을 바꾸고자..
new DataColumn("NAME"),
new DataColumn("REMARK")
});
for (int loop = 0; loop < 21; loop++)
dt.Rows.Add(loop, string.Format("{0} NAME", loop), loop % 3 == 0 ? "비고~" : " NONE ");
dataGridView1.DataSource = dt;
}
private void dataGridView1_RowPostPaint(object sender, DataGridViewRowPostPaintEventArgs e)
{
try
{
int no = Convert.ToInt32(dataGridView1["NO", e.RowIndex].Value);
switch (no % 7) // 7가지 색을 넣기위해..
{
case 0:
dataGridView1.Rows[e.RowIndex].DefaultCellStyle.BackColor = Color.Red;
break;
case 1:
dataGridView1.Rows[e.RowIndex].DefaultCellStyle.BackColor = Color.Orange;
break;
case 2:
dataGridView1.Rows[e.RowIndex].DefaultCellStyle.BackColor = Color.Yellow;
break;
case 3:
dataGridView1.Rows[e.RowIndex].DefaultCellStyle.BackColor = Color.Green;
break;
case 4:
dataGridView1.Rows[e.RowIndex].DefaultCellStyle.BackColor = Color.Blue;
break;
case 5:
dataGridView1.Rows[e.RowIndex].DefaultCellStyle.BackColor = Color.DarkBlue;
break;
case 6:
dataGridView1.Rows[e.RowIndex].DefaultCellStyle.BackColor = Color.Violet;
break;
default:
dataGridView1.Rows[e.RowIndex].DefaultCellStyle.BackColor = Color.Empty;
break;
}
}
catch
{
}
}
}
!! 참~~ 쉽당~
'# 2) .Net ( Vs 2005 ) > WinForm' 카테고리의 다른 글
| 작업트레이위에 스르륵!! 나타나는 폼! (0) | 2009.10.06 |
|---|---|
| 가상메서드 - 오버라이드... (0) | 2009.10.06 |
| Win Form이 스윽~~ 나오는 효과내기 (0) | 2009.09.23 |
| XmlHelper 를 만들다. (0) | 2009.09.23 |
| TextBox 페인트 이벤트 걸기. (2) | 2009.08.24 |
Win Form이 스윽~~ 나오는 효과내기
 invalid-file
폼을 Show하면 생뚱맞게 툭 튀어나는걸
부드럽게 살짝 뒤에서 앞으로 나오는듯이? 투명에서 불투명수치를 조정하면서 튀어나오는 효과를
만들어보았다.
Form에 Shown 이벤트에 걸어주면 됨.
protected override void OnShown(EventArgs e)
{
base.OnShown(e);
FormEffect(this);
}
// 이 메서드를 이용하게 된다.
private void FormEffect(Form fm)
{
double[] opacity = new double[] { 0.1d, 0.3d, 0.7d, 0.8d, 0.9d, 1.0d};
int cnt = 0;
System.Windows.Forms.Timer tm = new System.Windows.Forms.Timer();
{
fm.RightToLeftLayout = false;
fm.Opacity = 0d;
tm.Interval = 70; // 나타나는 속도를 조정함.
tm.Tick += delegate(object obj, EventArgs e)
{
if (( cnt +1 > opacity.Length) || fm == null)
{
tm.Stop();
tm.Dispose();
tm = null;
return;
}
else
{
fm.Opacity = opacity[cnt++];
}
};
tm.Start();
}
}
ps: 음 플젝에 적용해봤는데 MDI 부모창은 적용이 되는데 Mdi 자식창은 적용이 안되는것이...
쬐끔 아쉬웠던...
'# 2) .Net ( Vs 2005 ) > WinForm' 카테고리의 다른 글
| 가상메서드 - 오버라이드... (0) | 2009.10.06 |
|---|---|
| 그리드뷰 각 Row색 바꾸기. (1) | 2009.09.25 |
| XmlHelper 를 만들다. (0) | 2009.09.23 |
| TextBox 페인트 이벤트 걸기. (2) | 2009.08.24 |
| ControlPaint 객체.. (0) | 2009.08.20 |
XmlHelper 를 만들다.
헬퍼를 만들어서 사용하고자 뚝딱... 만들었음.
예전 사용방법은 XmlDocument 를 이용하여 xml파일을 읽어들이고
XmlElement와 XmlAttribute를 이용해서 조작했으나 너무 번거롭고 소스도 지저분해짐.
해서 아래와 같은 헬퍼클래스를 만들어 사용함.
주의! 이건 순수 xml구조로 파일을 만들어내고 xsd같은 스키마 형태는 지원되지 않으므로 사용상 주의!!
Xml 파일 로딩 방법.
XmlHelper.XmlHelperClass xdoc = new XmlHelper.XmlHelperClass(@"C:\Documents and Settings\MyHome\My Documents\Visual Studio 2005\Projects\MyControl\MenuXml.xml");
this.textBox1.Text = xdoc.ToXml();
--> Xml 생성방법.
XmlHelper.XmlHelperClass xdoc = new XmlHelper.XmlHelperClass();
xdoc.Root_XmlElmt = new XmlHelper.XmlElmt("Root"); // 처음 Element 생성
XmlHelper.XmlElmt e1 = new XmlHelper.XmlElmt("E1");
e1.Att_Add("att1_Name", "att1_Value");
xdoc.Root_XmlElmt.ElmtAdd(e1); // Depth처리로... 순서를 맞춰주면 좋음
XmlHelper.XmlElmt e2 = new XmlHelper.XmlElmt("E2");
e2.Att_Add("att2_Name", "att2_Value");
e1.ElmtAdd(e2);
XmlHelper.XmlElmt e3 = new XmlHelper.XmlElmt("E3");
e3.Att_Add("att3_Name", "att3_Value");
e2.ElmtAdd(e3);
XmlHelper.XmlElmt e4 = new XmlHelper.XmlElmt("E4");
e4.Att_Add("att4_Name", "att4_Value");
e3.ElmtAdd(e4);
XmlHelper.XmlElmt e5 = new XmlHelper.XmlElmt("E5");
e5.Att_Add("att5_Name", "att5_Value");
e5.Att_Add("att5a_Name", "att5a_Value");
e1.ElmtAdd(e5);
// xml 파일로 저장
xdoc.Save(@"C:\Documents and Settings\MyHome\My Documents\Visual Studio 2005\Projects\MyControl\OpenXml\OpenXml\xml_Folder\ttt.xml");
this.textBox1.Text = xdoc.ToXml();
// xdoc.Root_XmlElmt["E1"] 로 해당 엘리먼트를 뽑아낼수 있음.
// XmlElmt[] 로 반환되므로... 하위 엘리먼트까지 뽑아낼수 있음.
-- 결과 ---------------------------------------------------------------------------
<?xml version="1.0" encoding="utf-8"?>
<Root>
<E1 att1_Name="att1_Value">
<E2 att2_Name="att2_Value">
<E3 att3_Name="att3_Value">
<E4 att4_Name="att4_Value">
</E4>
</E3>
</E2>
<E5 att5_Name="att5_Value" att5a_Name="att5a_Value">
</E5>
</E1>
</Root>
----------------------------------------------------------------------------------
 invalid-file
- ElmtAdd : 엘리먼트 추가
- Save : 저장
- Load : 생성자를 통해 적용됨.( private 속성임 )
* 참고 : depth표현을 하고자 depth속성을 이용하는데 엘리먼트 추가시 자신의 depth를 조정받게 됨.
ex ) A.ElmtAdd( B );
A가 0이면 B가 1이 됨. A가 3 이면 B가 4가됨.
ToXml() 호출시 tab 문자가 뎁스만큼 붙어서 출력됨.
--> 2010년 3월 14일 추가사항..
Plugin 리스트 관리를 xml로 만들면서 사용하니 Attribute 뽑는것을 잊고 있었다.. 하여
GetAtt( string AttName )을 추가하였다.
'# 2) .Net ( Vs 2005 ) > WinForm' 카테고리의 다른 글
| 그리드뷰 각 Row색 바꾸기. (1) | 2009.09.25 |
|---|---|
| Win Form이 스윽~~ 나오는 효과내기 (0) | 2009.09.23 |
| TextBox 페인트 이벤트 걸기. (2) | 2009.08.24 |
| ControlPaint 객체.. (0) | 2009.08.20 |
| TextBox에 드래그앤드랍 구현하기.! (0) | 2009.08.20 |
TextBox 페인트 이벤트 걸기.
텍스박스에 Paint 를 재정의 하고 싶을때 아래와 같이 재정의해서 생성자에 한줄 넣어주면
OnPaint를 쓸수가 있게 된다.
public class TTB : TextBox
{
public TTB()
{
base.SetStyle(ControlStyles.UserPaint, true);
}
protected override void OnPaint(PaintEventArgs e)
{
base.OnPaint(e);
}
}
'# 2) .Net ( Vs 2005 ) > WinForm' 카테고리의 다른 글
| Win Form이 스윽~~ 나오는 효과내기 (0) | 2009.09.23 |
|---|---|
| XmlHelper 를 만들다. (0) | 2009.09.23 |
| ControlPaint 객체.. (0) | 2009.08.20 |
| TextBox에 드래그앤드랍 구현하기.! (0) | 2009.08.20 |
| ErrorProvider 라는게 있음. (0) | 2009.08.18 |
ControlPaint 객체..
ControlPaint
ControlPaint.DrawBorder3D(e.Graphics, panel1.DisplayRectangle, Border3DStyle.Etched );
ControlPaint.DrawGrid(e.Graphics, panel1.DisplayRectangle, new Size(10, 10), Color.Blue);
ControlPaint.DrawRadioButton(e.Graphics, new Rectangle(10,10,10,10) , ButtonState.Checked);
ControlPaint.DrawSizeGrip(e.Graphics, Color.Red, new Rectangle(panel1.Width - 10, panel1.Height -10 ,10,10));
보더, 그리드, 라디오버튼그림, 사이즈그립표시 가 아래 적용된것이고 더 많이 있음.
적용한 이미지는 아래 참조.
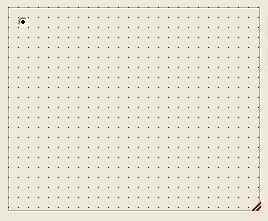
판넬에 그룹박스처럼 외곽 보더를 바꾸고자 할때 사용할 수 있음.
참고 :
TextboxRender 라는게 있고... ComboBoxRender도 있고...
지원되는게 더있드라... 찾아봐야징...
'# 2) .Net ( Vs 2005 ) > WinForm' 카테고리의 다른 글
| XmlHelper 를 만들다. (0) | 2009.09.23 |
|---|---|
| TextBox 페인트 이벤트 걸기. (2) | 2009.08.24 |
| TextBox에 드래그앤드랍 구현하기.! (0) | 2009.08.20 |
| ErrorProvider 라는게 있음. (0) | 2009.08.18 |
| 바인딩네비게이터와 프로퍼티그리드 연결 (0) | 2009.08.18 |
TextBox에 드래그앤드랍 구현하기.!
드래그앤드롭 구현인데
SQL Management 처럼
테이블 트리에서 -> 에디터폼에 목록 드래그시 Text 마우스 커서 위치에
데이타 넣는 처리.
훈스에서 어떤 분이 질문한거 잠깐 구현해서 넣었음.
이를 글로 적어둠.
TextBox에 드래그오버시 Textbox에 캐럿을 마우스현위치로 이동시키는 처리가 필요했음.
GetPositionFromCharIndex 과
GetCharIndexFromPosition 로 처리가 가능해짐.
textBox.ArrowDrop = true;
private void button3_MouseDown(object sender, MouseEventArgs e)
{
textBox1.DoDragDrop(button3.Text, DragDropEffects.All);
}
private void textBox1_DragEnter(object sender, DragEventArgs e)
{
textBox1.Focus();
e.Effect = e.AllowedEffect;
}
private void textBox1_DragOver(object sender, DragEventArgs e)
{
if ((textBox1.PointToClient(new Point(e.X, e.Y)).X ) > textBox1.GetPositionFromCharIndex(this.textBox1.TextLength - 1).X)
{
this.textBox1.SelectionStart = this.textBox1.TextLength;
}
else
{
textBox1.SelectionStart = textBox1.GetCharIndexFromPosition(textBox1.PointToClient(new Point(e.X, e.Y)));
}
}
private void textBox1_DragDrop(object sender, DragEventArgs e)
{
this.textBox1.Paste(e.Data.GetData( typeof(string)).ToString());
}
'# 2) .Net ( Vs 2005 ) > WinForm' 카테고리의 다른 글
| TextBox 페인트 이벤트 걸기. (2) | 2009.08.24 |
|---|---|
| ControlPaint 객체.. (0) | 2009.08.20 |
| ErrorProvider 라는게 있음. (0) | 2009.08.18 |
| 바인딩네비게이터와 프로퍼티그리드 연결 (0) | 2009.08.18 |
| 바인딩 네비게이터 (0) | 2009.08.14 |
